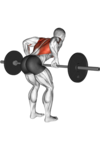
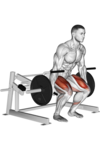
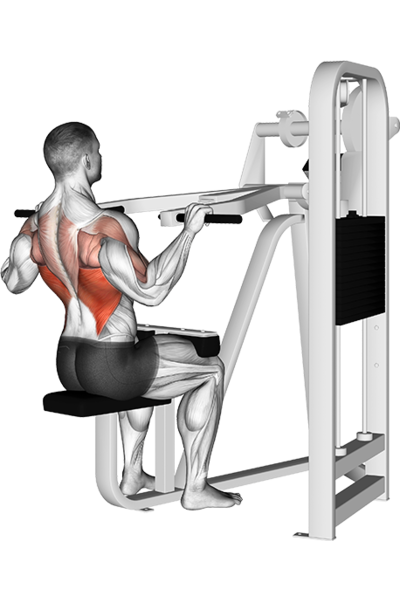
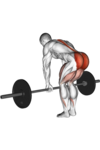
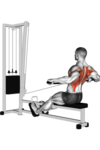
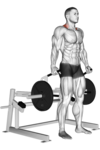
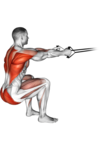
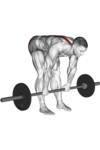
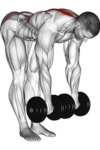
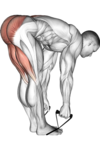
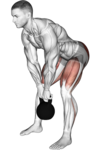
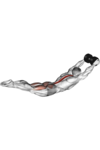
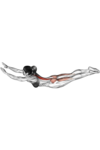
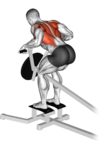
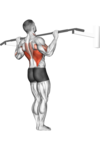
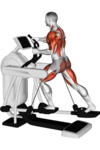
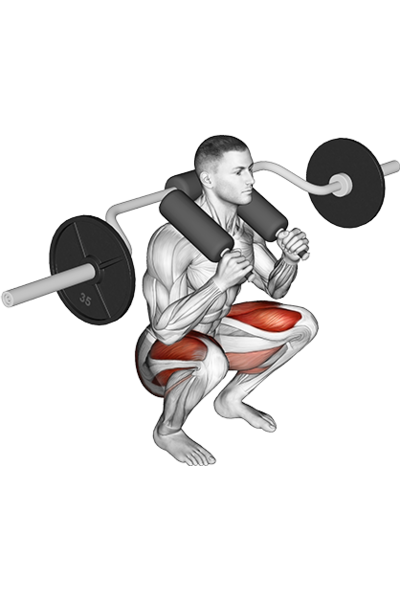
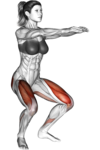
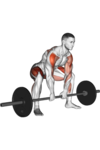
Muscle Groups
Muscles
Target
Synergist
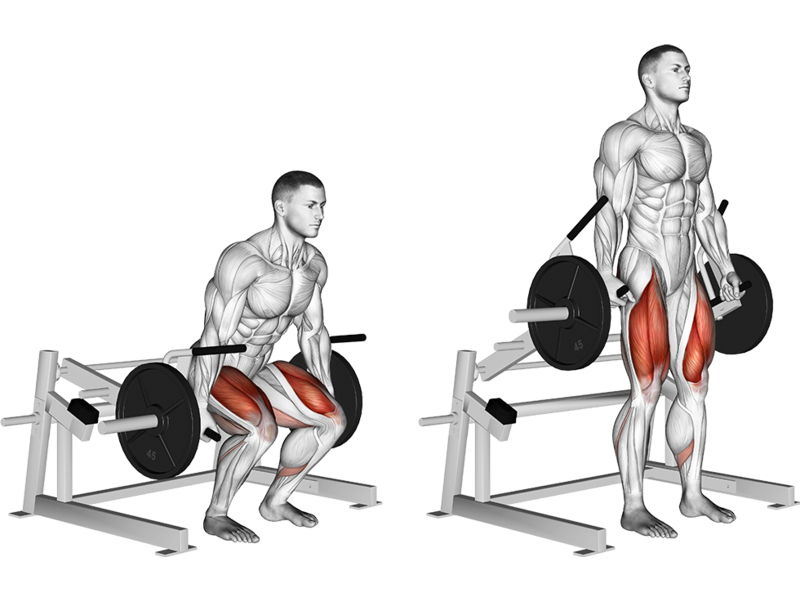
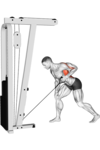
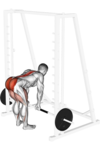
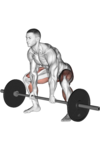
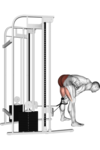
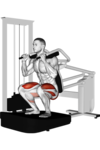
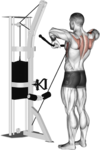
How to perform Leverage Machine Deadlift with proper form
Setup
- Adjust Machine: Set the lever arm to an appropriate height, so you can start with your knees slightly bent and feet flat on the platform.
- Foot Position: Stand with your feet shoulder-width apart, flat against the footplate.
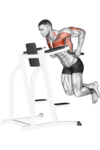
Grip
- Hand Placement: Grab the handles or bar with both hands, using a neutral (palms facing each other) or overhand grip, depending on the machine design.
Starting Position
- Back Position: Keep your back straight and chest up. Engage your core to stabilize your spine.
- Knees and Hips: Position your knees just behind your toes; hips should be lower than your shoulders.
Execution
- Initiate the Lift: Push through your heels, extending your knees and hips simultaneously.
- Maintain Form: Keep the weights close to your body as you rise. Avoid rounding your back or leaning too far forward.
- Full Extension: Stand upright at the top of the movement, ensuring your shoulders are back and down.
Lowering the Weight
- Control the Descent: Hinge at your hips first, then bend your knees while keeping your back straight.
- Return to Start: Lower the weight back to the starting position in a controlled manner, avoiding sudden drops or jerks.
Tips
- Breathing: Inhale before the lift and exhale at the top.
- Focus on Form: Prioritize proper technique over lifting heavy weights to prevent injury.
- Avoid Overextension: Do not hyperextend your back at the top of the lift.
Always consult with a professional trainer if you're unsure about your form or the equipment.
Exercises

Back Extension, Bodyweight
Type: Lower, Core
Target: Back
Synergist: Glutes, Hamstrings
Back Extension, Leverage Machine
Type: Lower, Core
Target: Back
Synergist: Glutes, Hamstrings
Ball Slams, Medicine Ball
Type: Core, Upper
Target: Shoulders, Back
Synergist: Chest, Abs
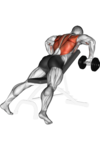
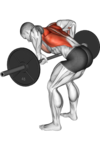
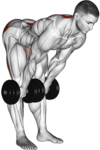
Bent Over One Arm Row, Dumbbell
Type: Upper, Pull
Target: Back
Synergist: Shoulders, Biceps, Forearms, Chest
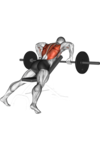
Bent Over Row, Barbell
Type: Upper, Pull
Target: Back
Synergist: Shoulders, Biceps, Forearms
Bent Over Row, Cable
Type: Upper, Pull
Target: Back
Synergist: Shoulders, Biceps, Forearms
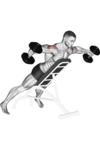
Bent Over Row, Dumbbell
Type: Upper, Pull
Target: Back
Synergist: Shoulders, Biceps, Forearms
Bent Over Row, Smith Machine
Type: Upper, Pull
Target: Back
Synergist: Shoulders, Biceps, Forearms
Bent Over Row, Band
Type: Upper, Pull
Target: Back
Synergist: Shoulders, Biceps, Forearms
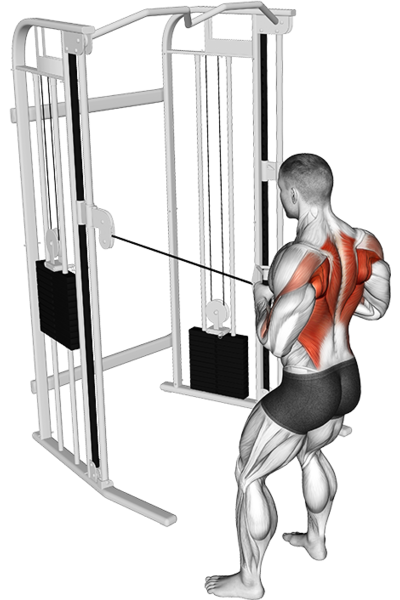
Bent Over Row, Leverage Machine
Type: Upper, Pull
Target: Back
Synergist: Shoulders, Biceps, Forearms
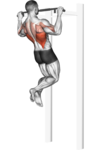
Chin Up, Bodyweight
Type: Upper, Pull
Target: Back
Synergist: Biceps, Forearms, Shoulders, Chest

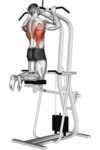
Chin Up, Leverage Machine
Type: Upper, Pull
Target: Back
Synergist: Biceps, Forearms, Shoulders, Chest

Clean, Barbell
Type: Upper, Lower, Push
Target: Glutes, Hamstrings, Quadriceps, Back, Shoulders
Synergist: Calves, Biceps, Chest, Forearms

Clean and Jerk, Barbell
Type: Upper, Lower, Push
Target: Glutes, Hamstrings, Quadriceps, Back, Shoulders
Synergist: Calves, Biceps, Chest, Forearms

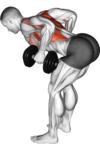
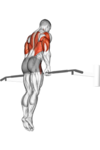
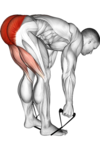
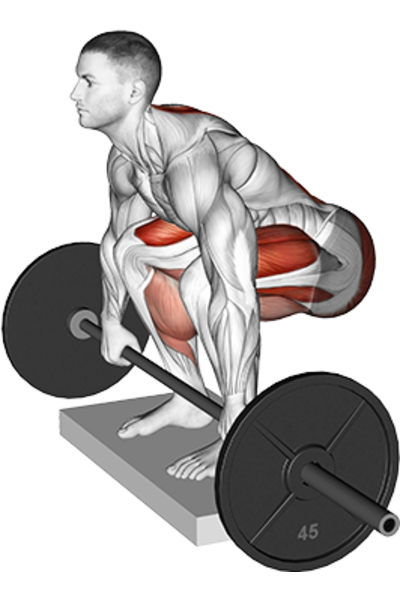
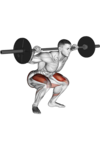
Deadlift, Barbell
Type: Lower, Pull
Target: Glutes, Back, Hamstrings
Synergist: Quadriceps, Calves, Abs, Forearms
Deadlift, Cable
Type: Lower, Pull
Target: Glutes, Back, Hamstrings
Synergist: Quadriceps, Calves, Abs, Forearms
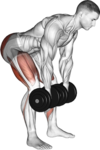
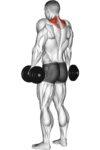
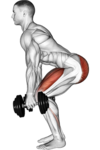
Deadlift, Dumbbell
Type: Lower, Pull
Target: Glutes, Back, Hamstrings
Synergist: Quadriceps, Calves, Abs, Forearms
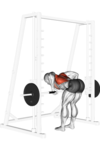
Deadlift, Smith Machine
Type: Lower, Pull
Target: Glutes, Back, Hamstrings
Synergist: Quadriceps, Calves, Abs, Forearms
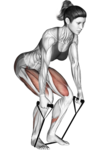
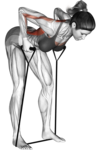
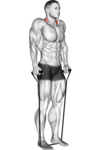
Deadlift, Band
Type: Lower, Pull
Target: Glutes, Back, Hamstrings
Synergist: Quadriceps, Calves, Abs, Forearms
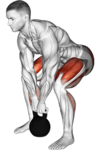
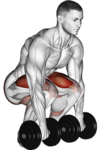
Deadlift, Kettlebell
Type: Lower, Pull
Target: Glutes, Back, Hamstrings
Synergist: Quadriceps, Calves, Abs, Forearms
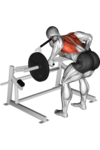
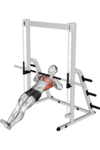
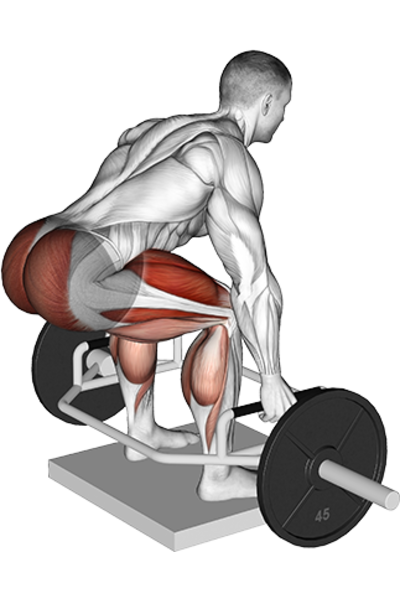
Deadlift, Leverage Machine
Type: Lower, Pull
Target: Glutes, Back, Hamstrings
Synergist: Quadriceps, Calves, Abs, Forearms
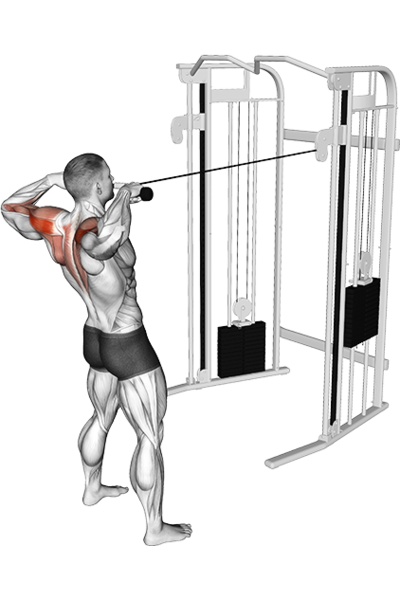
High Row, Cable
Type: Upper, Pull
Target: Back
Synergist: Biceps, Forearms, Shoulders
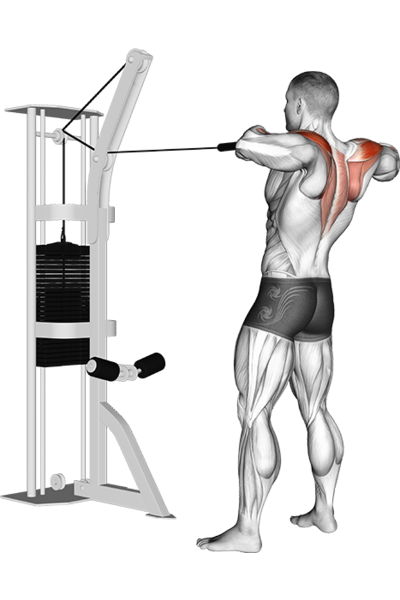
High Row, Leverage Machine
Type: Upper, Pull
Target: Back
Synergist: Biceps, Forearms, Shoulders
Incline Row, Barbell
Type: Upper, Pull
Target: Back
Synergist: Shoulders, Biceps, Forearms, Chest
Incline Row, Dumbbell
Type: Upper, Pull
Target: Back
Synergist: Shoulders, Biceps, Forearms, Chest
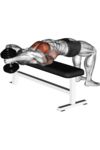
Inverted Row, Bodyweight
Type: Upper, Pull
Target: Back
Synergist: Shoulders, Biceps, Forearms, Chest
Kneeling Pulldown, Band
Type: Upper, Pull
Target: Back
Synergist: Biceps, Forearms, Shoulders
Lat Pulldown, Cable
Type: Upper, Pull
Target: Back
Synergist: Biceps, Forearms, Shoulders, Abs, Chest
Lat Pulldown, Leverage Machine
Type: Upper, Pull
Target: Back
Synergist: Biceps, Forearms, Shoulders, Abs, Chest
Muscle Up, Bodyweight
Type: Upper, Pull
Target: Biceps, Forearms, Shoulders, Back, Chest, Triceps
Pendlay Row, Barbell
Type: Upper, Pull
Target: Back
Synergist: Shoulders, Biceps, Forearms
Pull Up, Band
Type: Upper, Pull
Target: Back
Synergist: Biceps, Forearms, Shoulders
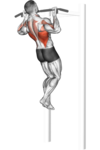
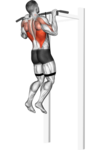
Pull Up, Bodyweight
Type: Upper, Pull
Target: Back
Synergist: Biceps, Forearms, Shoulders
Pull Up, Leverage Machine
Type: Upper, Pull
Target: Back
Synergist: Biceps, Forearms, Shoulders
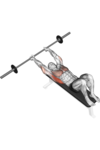
Pullover, Barbell
Type: Upper, Pull
Target: Back
Synergist: Chest, Shoulders, Triceps
Pullover, Dumbbell
Type: Upper, Pull
Target: Back
Synergist: Chest, Shoulders, Triceps
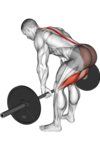
Romanian Deadlift, Barbell
Type: Lower, Legs
Target: Back, Glutes, Hamstrings
Synergist: Abs, Calves
Romanian Deadlift, Dumbbell
Type: Lower, Legs
Target: Back, Glutes, Hamstrings
Synergist: Abs, Calves
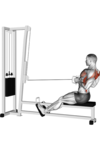
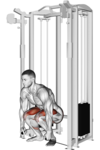
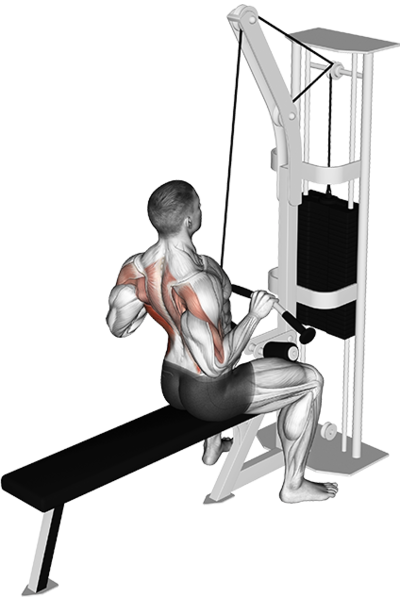
Seated Row, Cable
Type: Upper, Pull
Target: Back
Synergist: Shoulders, Biceps, Forearms, Chest
Seated Row, Band
Type: Upper, Pull
Target: Back
Synergist: Shoulders, Biceps, Forearms, Chest

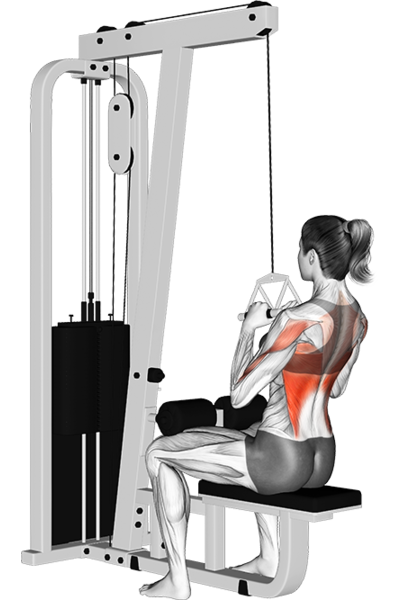
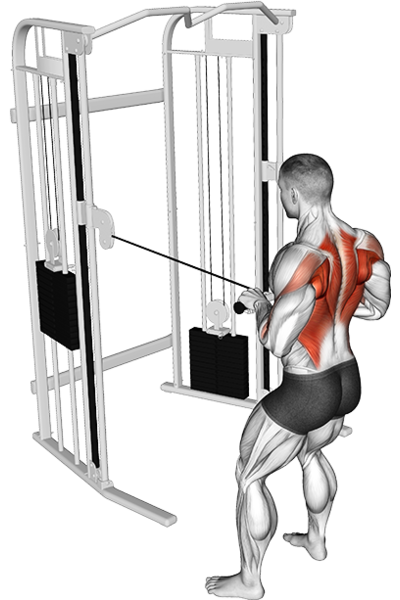
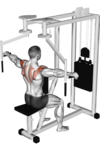
Seated Row, Leverage Machine
Type: Upper, Pull
Target: Back
Synergist: Shoulders, Biceps, Forearms, Chest
Seated Wide Grip Row, Cable
Type: Upper, Pull
Target: Back
Synergist: Shoulders, Biceps, Forearms

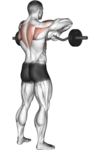
Shrug, Barbell
Type: Upper, Pull
Target: Back

Shrug, Cable
Type: Upper, Pull
Target: Back
Shrug, Dumbbell
Type: Upper, Pull
Target: Back
Shrug, Smith Machine
Type: Upper, Pull
Target: Back
Shrug, Band
Type: Upper, Pull
Target: Back
Shrug, Leverage Machine
Type: Upper, Pull
Target: Back
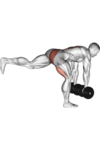
Single Leg Deadlift, Dumbbell
Type: Lower, Legs
Target: Back, Glutes
Synergist: Hamstrings
Single Leg Deadlift, Bodyweight
Type: Lower, Legs
Target: Back, Glutes
Synergist: Hamstrings
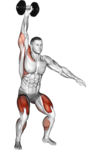
Snatch, Dumbbell
Type: Upper, Lower, Pull
Target: Shoulders, Back, Glutes, Quadriceps
Synergist: Hamstrings, Calves, Chest, Triceps
Squat Row, Band
Type: Upper, Lower, Pull
Target: Glutes, Back
Synergist: Shoulders, Hamstrings, Chest, Quadriceps, Calves
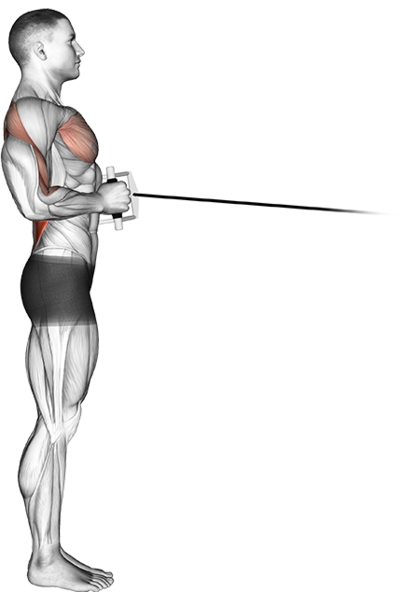
Standing Row, Cable
Type: Upper, Pull
Target: Back
Synergist: Shoulders, Biceps, Forearms
Standing Row Close Grip, Cable
Type: Upper, Pull
Target: Back
Synergist: Shoulders, Biceps, Forearms
Standing Row V-Bar, Cable
Type: Upper, Pull
Target: Back
Synergist: Shoulders, Biceps, Forearms, Chest
Stiff Leg Deadlift, Barbell
Type: Lower, Legs
Target: Back, Glutes, Hamstrings
Synergist: Quadriceps, Abs
Stiff Leg Deadlift, Dumbbell
Type: Lower, Legs
Target: Back, Glutes, Hamstrings
Synergist: Quadriceps, Abs
Stiff Leg Deadlift, Band
Type: Lower, Legs
Target: Back, Glutes, Hamstrings
Synergist: Quadriceps, Abs
Straight Leg Deadlift, Barbell
Type: Lower, Legs
Target: Back, Hamstrings
Synergist: Glutes
Straight Leg Deadlift, Dumbbell
Type: Lower, Legs
Target: Back, Hamstrings
Synergist: Glutes
Straight Leg Deadlift, Band
Type: Lower, Legs
Target: Back, Hamstrings
Synergist: Glutes
Straight Leg Deadlift, Kettlebell
Type: Lower, Legs
Target: Back, Hamstrings
Synergist: Glutes
Sumo Deadlift, Barbell
Type: Lower, Legs
Target: Glutes, Quadriceps, Hamstrings, Back
Synergist: Abs, Biceps, Forearms
Superman, Dumbbell
Type: Core
Target: Back
Synergist: Glutes, Hamstrings
Superman, Bodyweight
Type: Core
Target: Back
Synergist: Glutes, Hamstrings
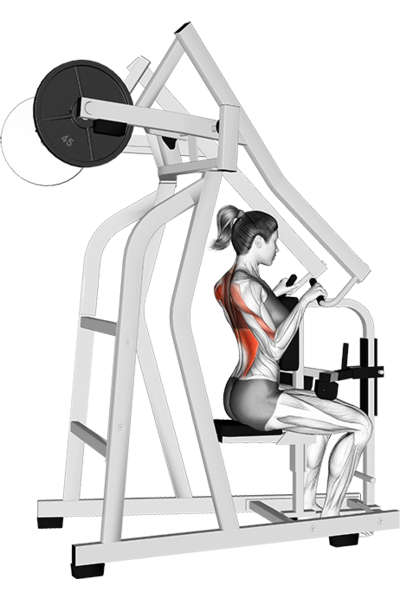
T Bar Row, Leverage Machine
Type: Upper, Pull
Target: Back
Synergist: Shoulders, Biceps, Forearms, Chest
Wide Pull Up, Bodyweight
Type: Upper, Pull
Target: Back
Synergist: Biceps, Forearms, Shoulders
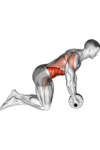
Ab Wheel, Bodyweight
Type: Core
Target: Abs
Synergist: Hamstrings, Quadriceps, Shoulders, Back, Chest
Around The World, Dumbbell
Type: Core
Target: Shoulders, Chest
Synergist: Back
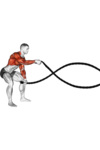
Battle Ropes, Bodyweight
Type: Upper, Core
Target: Shoulders
Synergist: Biceps, Forearms, Back
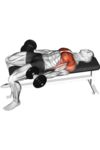
Bench Dip, Bodyweight
Type: Upper, Push
Target: Triceps
Synergist: Shoulders, Back, Chest
Cable Pull Through, Cable
Type: Lower, Pull
Target: Glutes
Synergist: Back, Hamstrings
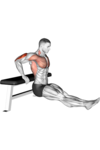
Chest Dip, Bodyweight
Type: Upper, Push
Target: Chest
Synergist: Shoulders, Back, Triceps

Deadlift High Pull, Barbell
Type: Upper, Lower, Pull
Target: Shoulders, Glutes, Quadriceps
Synergist: Hamstrings, Biceps, Forearms, Calves, Back
Deficit Deadlift, Barbell
Type: Lower, Pull
Target: Glutes
Synergist: Hamstrings, Back, Quadriceps, Calves
Deficit Deadlift, Trap Bar
Type: Lower, Pull
Target: Glutes
Synergist: Hamstrings, Back, Quadriceps, Calves
Elliptical Machine, Leverage Machine
Type: Lower, Legs
Synergist: Biceps, Forearms, Shoulders, Glutes, Hamstrings, Back, Chest, Quadriceps

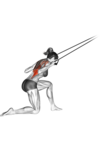
Face Pull, Band
Type: Upper, Pull
Target: Shoulders
Synergist: Biceps, Forearms, Back
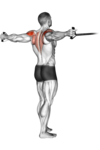
Reverse Fly, Dumbbell
Type: Upper, Pull
Target: Shoulders
Synergist: Back
Reverse Fly, Band
Type: Upper, Pull
Target: Shoulders
Synergist: Back
Reverse Fly, Leverage Machine
Type: Upper, Pull
Target: Shoulders
Synergist: Back
Safety Squat Bar Squat, Barbell
Type: Lower, Legs
Target: Glutes, Quadriceps
Synergist: Hamstrings, Back, Calves
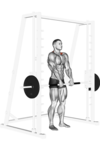
Squat, Barbell
Type: Lower, Legs
Target: Glutes, Quadriceps
Synergist: Hamstrings, Calves, Back, Abs
Squat, Dumbbell
Type: Lower, Legs
Target: Glutes, Quadriceps
Synergist: Hamstrings, Calves, Back, Abs
Squat, Smith Machine
Type: Lower, Legs
Target: Glutes, Quadriceps
Synergist: Hamstrings, Calves, Back, Abs
Squat, Bodyweight
Type: Lower, Legs
Target: Glutes, Quadriceps
Synergist: Hamstrings, Calves, Back, Abs
Squat, Leverage Machine
Type: Lower, Legs
Target: Glutes, Quadriceps
Synergist: Hamstrings, Calves, Back, Abs
Standing Row Rear Delt With Rope, Cable
Type: Upper, Pull
Target: Shoulders
Synergist: Biceps, Forearms, Back
Standing Row Rear Delt, Horizontal, With Rope, Cable
Type: Upper, Pull
Target: Shoulders
Synergist: Back
Sumo Deadlift High Pull, Barbell
Type: Upper, Lower, Pull
Target: Shoulders, Glutes, Quadriceps
Synergist: Hamstrings, Biceps, Forearms, Calves, Back
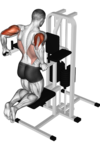
Triceps Dip, Bodyweight
Type: Upper, Push
Target: Triceps
Synergist: Back, Chest, Shoulders
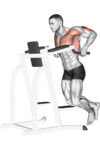
Triceps Dip, Leverage Machine
Type: Upper, Push
Target: Triceps
Synergist: Back, Chest, Shoulders
Upright Row, Barbell
Type: Upper, Pull
Target: Shoulders
Synergist: Biceps, Forearms, Chest, Back
Upright Row, Cable
Type: Upper, Pull
Target: Shoulders
Synergist: Biceps, Forearms, Chest, Back
Upright Row, Dumbbell
Type: Upper, Pull
Target: Shoulders
Synergist: Biceps, Forearms, Chest, Back
Upright Row, Band
Type: Upper, Pull
Target: Shoulders
Synergist: Biceps, Forearms, Chest, Back